
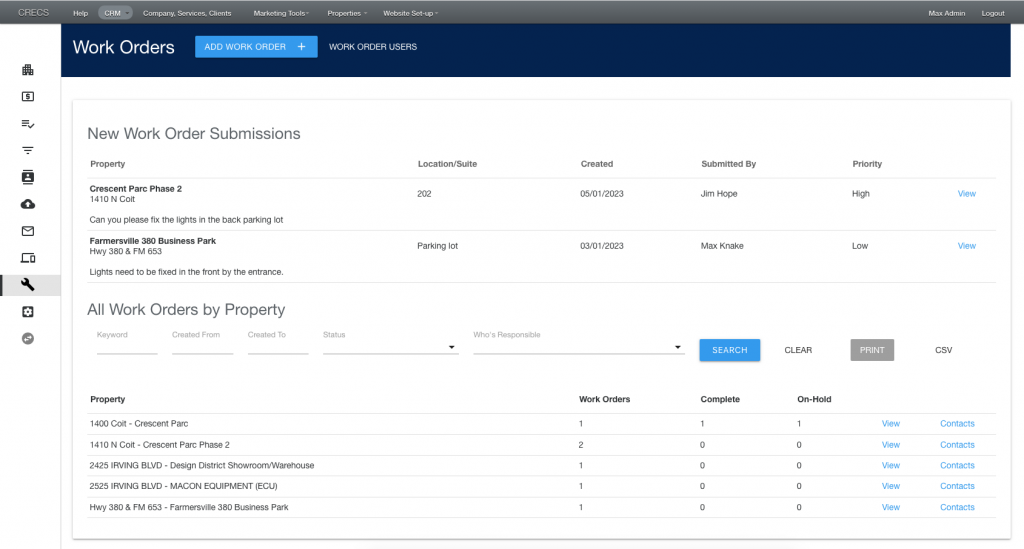
One place to mange your work order, maintenance requests, property managers, vendors, task assignments, progress and communication.
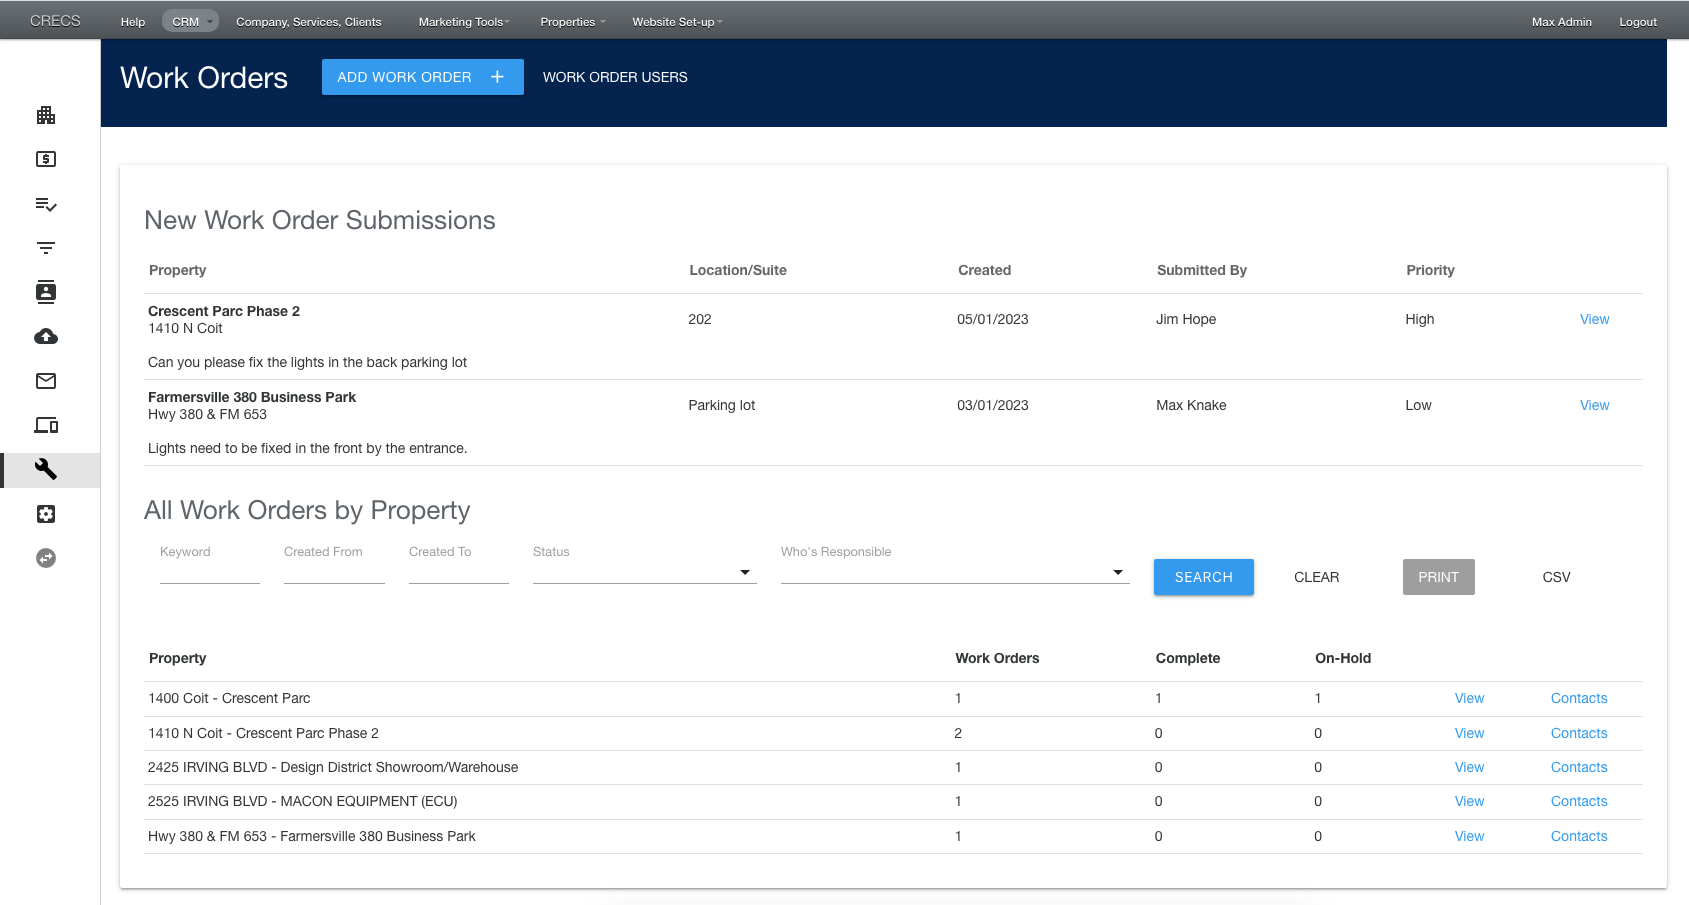
Users can include the following:
- Property Managers – Create and manage work orders, users and receive alerts for one or more properties
- Property Maintenance/Vendors – Receive alerts and create work order progress notes for one or more properties
- Tenants – Submit and see status updates on work order associated with specific properties
- Owners – Review and see reporting on work order associated with specific properties
To add/manage users click on the wrench, expand the Work Order menu and click on Work Order Users.
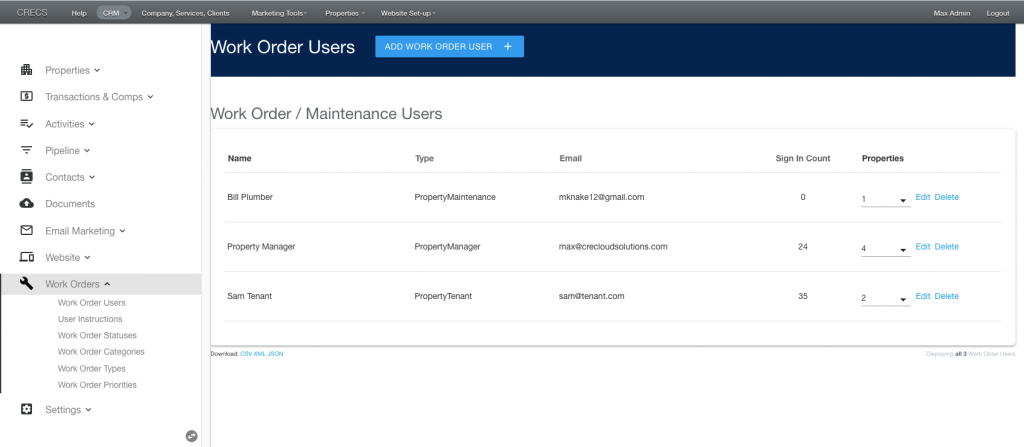
Steps:
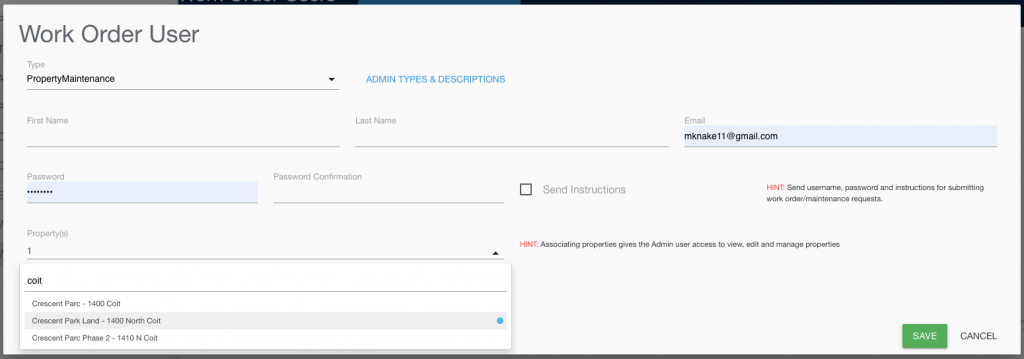
- Click the ADD WORK ORDER USER + button
- Select the Type of work order user
- Enter their name, contact information and password
- You can send them instructions for setting up their account and how it works based on the Type of work order user you select.
- Select the properties they will be assocaited with. These are properties they will be able to see work orders assigned to them by the Property Manager and make notes for progress updates as well as receive email alert notification.
- Save
Create custom Elementor Form that can be used on your website for Tenants to easily submit maintenance requests.
When submitted, a Maintenance Request/ Work Order is created, associated with a Property in your Work Order Management system and email alert notifications are sent to Property Management personnel.
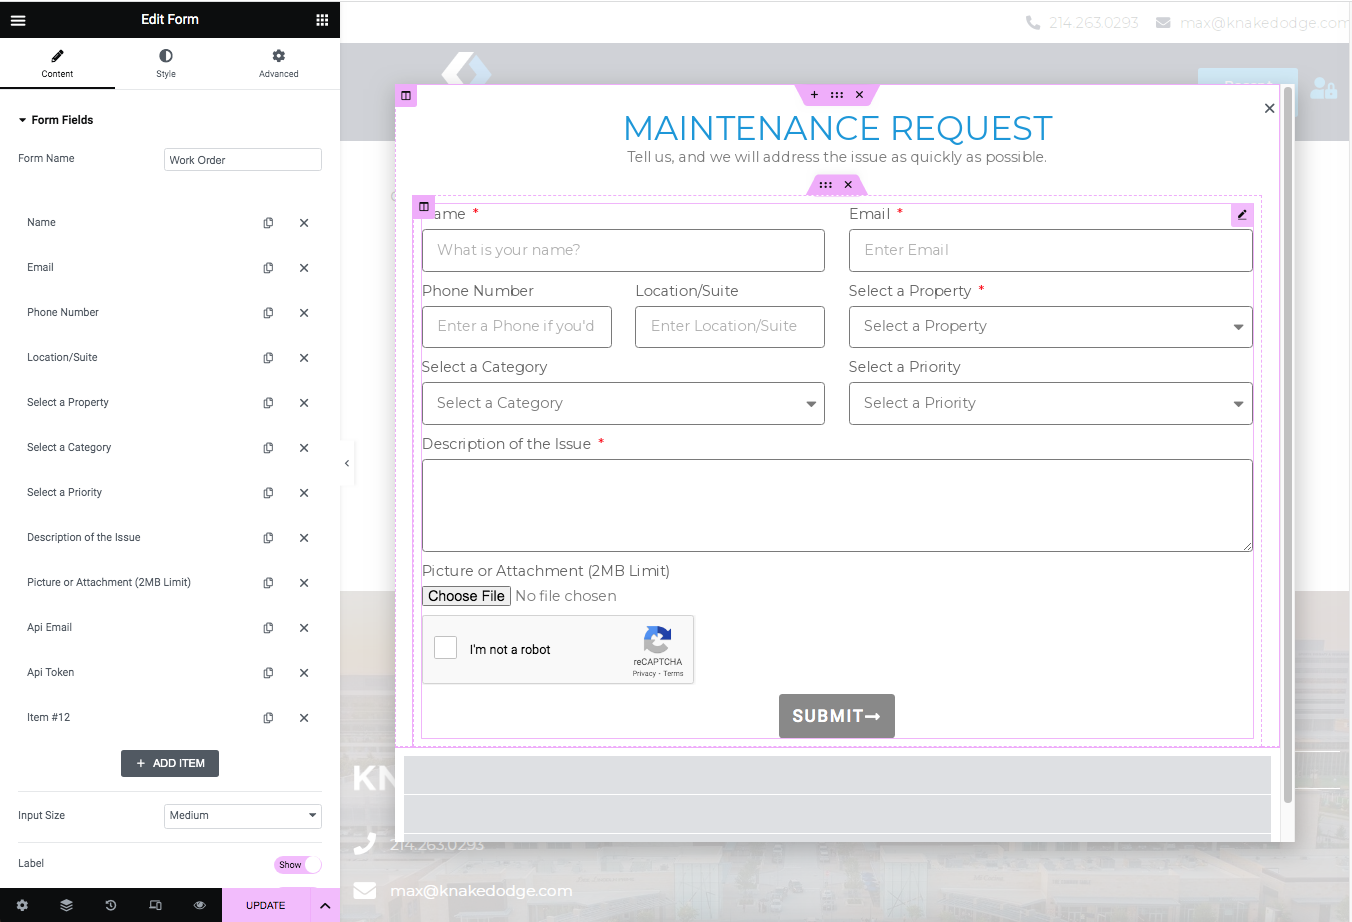
Elementor Maintenance Request Form Field Configurations:
- Form Name – This is the name that will display in the subject line of the email alert notification, the Contact Event that is created when a submitted and the name that can be used in ‘Alert Notifications’ to associate other Admin users to receive the Email Alert Notification (in addition to all Super Admin users)
- Name – Advanced Tab: ID = wo_user_name (Content Tab: Required = Yes)
- Email – Advanced Tab: ID = wo_admin_user_email (Content Tab: Required = Yes)
- Phone Number – Advanced Tab: ID = wo_user_phone
- Location/Suite – Advanced Tab: ID = wo_location_suite
- Select a Property – Advanced Tab: ID = wo_property_address (Content Tab: Required = Yes)
- Select a Category – Advanced Tab: ID = wo_work_order_category
- Select a Priority – Advanced Tab: ID = wo_work_order_priority
- Description of the Issue – Advanced Tab: ID = wo_description (Content Tab: Required = Yes)
- Picture or Attachment – Advanced Tab: ID = wo_attachment
Form Integration and security settings:
1. Email API – Username: Form Field “Hidden” with:
- Default Value = [CRECS Super Admin Username]
- ID = “email”
- Shortcode = [field id=”email”]
2. API Token – Username: Form Field “Hidden” with:
- Default Value = [CRECS Super Admin Token found in Admin Account]
- ID = “user_token”
- Shortcode = [field id=”user_token”]
3. Item #12 = Content Type = reCAPTCHA
4. Action After Submit = Webhook
5. Webhook
- Webhook URL: https://[CRECS Admin Domain]/api/v1/custom_form
- Advanced Data = Yes
6. How to add a title to the Select/Drop Down fields:
1. Add a “Dynamic Field Data” element for each Select field used
2. In the Content Tab add the following configurations:
2. In the Content Tab add the following configurations:
- Data Collection = Priority
- Prompt = “What you would like to display as default”
- Field ID = The Field ID that corresponds to the Field above
Notification email alerts:
To set up an email alert when a form is submitted follow these steps…
- In the Admin open CRM / Alert Notification (top nav)
- Click the ‘New Alert Notification’
- Enter/select the following
- Name = The ‘Form Name‘ of the Elementor form. This is found at the top of Edit Form under ‘Form Fields’. This links the too together.
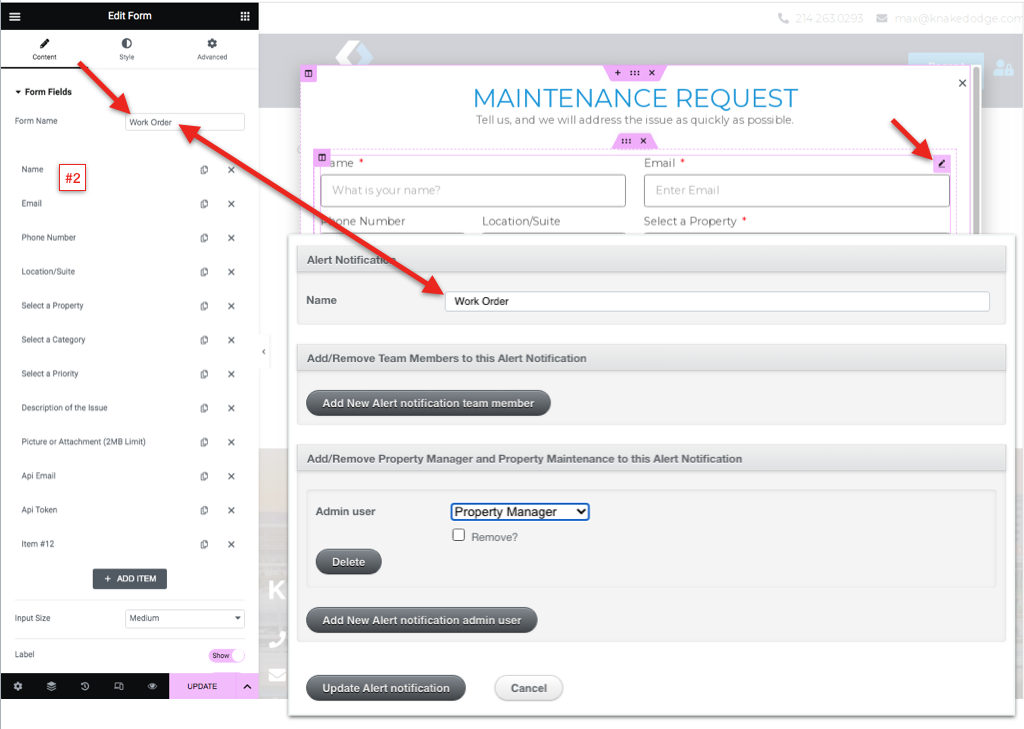
- Add Team Members or Property Managers you’d like the email alert to be sent to.