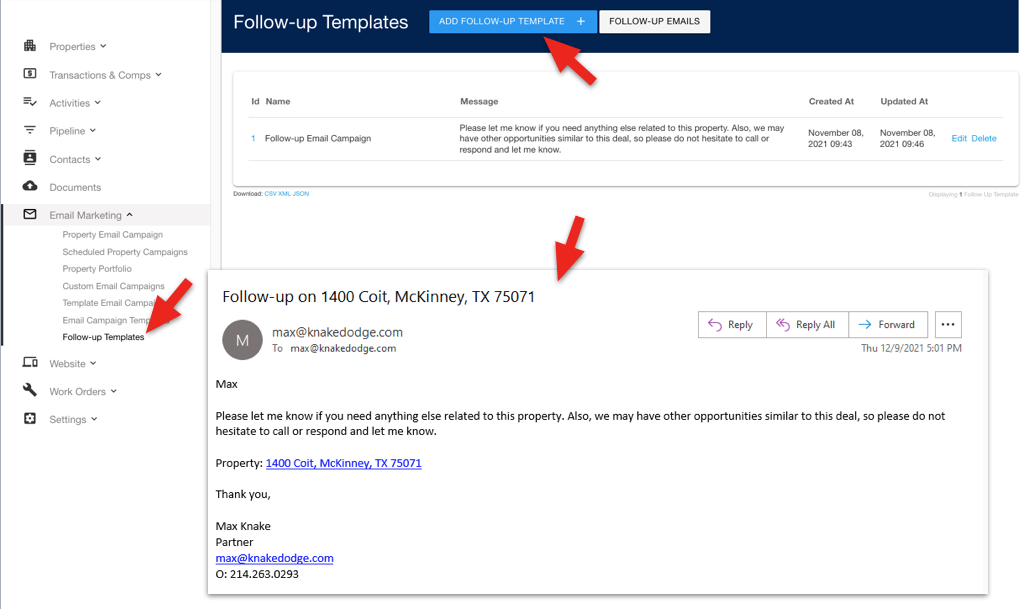
First, create a Follow-up Message template under the Email Marketing in the Follow-up Templates. Click the “ADD FOOLOW_UP TEMPLATE +” button and create a follow-up message template. Once created they can be assigned to a property email campaign. Steps below.
Steps for creating a property email campaign with a automated follow-up message:
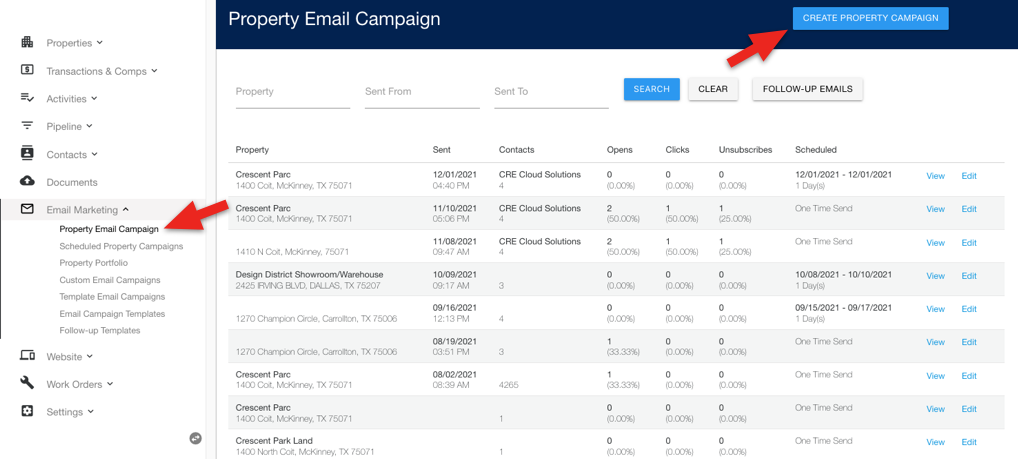
1. From the Email Marketing / Property Email Campaign click the “CREATE PROPERTY CAMPAIGN” button on the top-right.
2. Select the SAVED SEARCH from Campaign Contacts drop down to associate the contact list for the campaign.
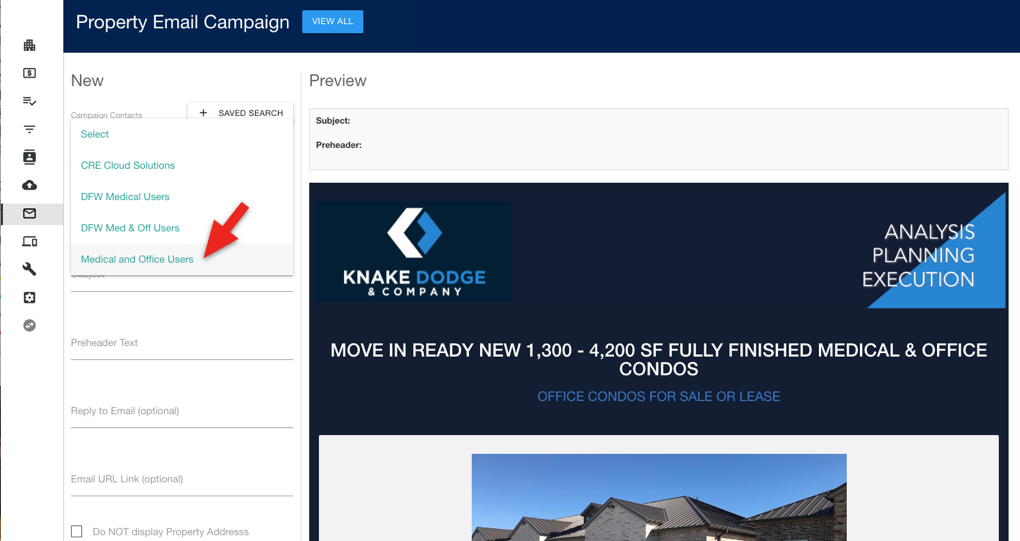
3. Enter and select the Property which will auto-populate the property and enter the email subject, pre-header text (the text that displays in the first line below the subject when reviewing emails), and check the images and map if you’d like these to display.

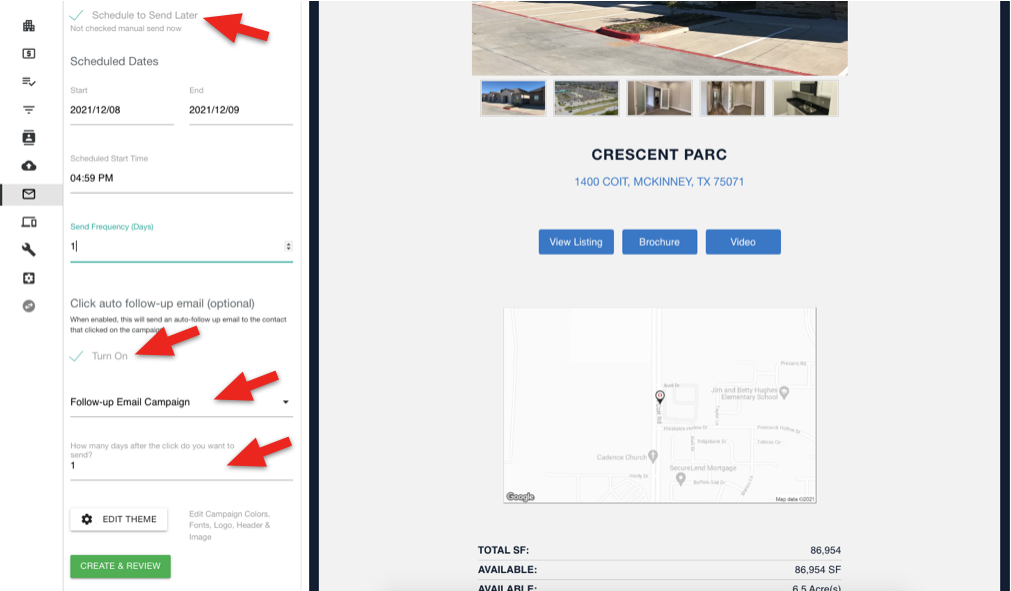
4. Schedule to send later or on a recurring schedule. If you want to set-up a auto follow-up email, turn on, select the Follow-up Template and enter the how many days before the follow-up email is sent. This is triggered only if the contact receiving clicks the “View Listing” or “Brochure” buttons.
5. Once created and sent the sent, open, click and unsubscribe stats are tracked (at the bottom of the campaign and at the property level).

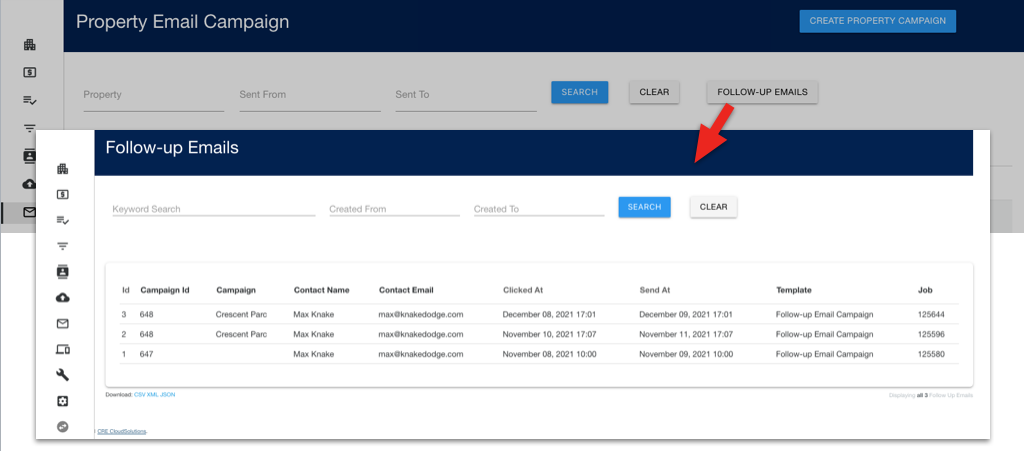
You can also, view the Follow-up queue (below) to view who clicked, when they clicked and when the follow-up email will be sent.
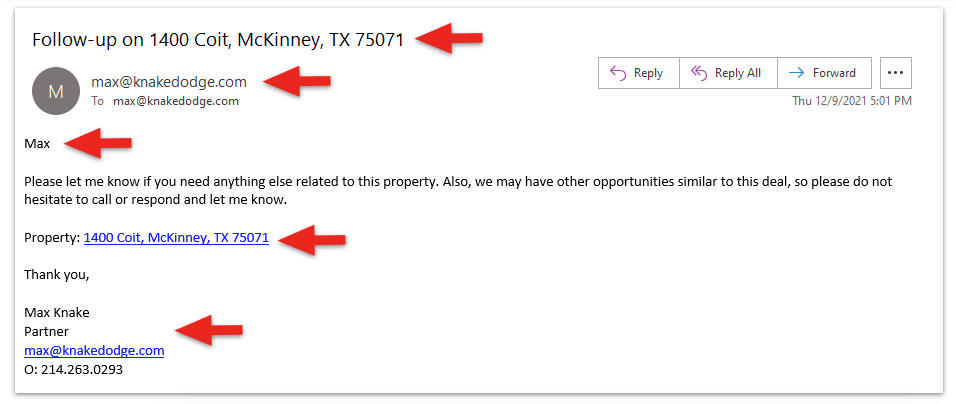
When the follow-up message is sent it will include:
- Subject with the property address
- From the team member associated with the property as well as their signature
- The first name of the contact
- A property address link to open the property page on your website